In our fast-paced world, it's common for clothing items to wear out or get damaged over time. However, throwing them away and buying new ones isn't always the most sustainable or cost-effective solution. That's where clothing repairs come in. By learning a few simple techniques, you can easily mend and enhance the longevity of your wardrobe.
In this article, we will explore various methods and tips for clothing repairs made easy, allowing you to extend the life of your favorite garments. So, grab your sewing kit and let's get started!
Clothing Repairs Made Easy: Enhancing Wardrobe Longevity
When it comes to maintaining a sustainable and eco-friendly lifestyle, clothing repairs play a crucial role. By repairing your clothes instead of discarding them, you contribute to reducing textile waste and the carbon footprint associated with garment production. Moreover, by enhancing the longevity of your wardrobe, you save money in the long run, as you won't need to constantly replace items.
Sustainable Fashion and Clothing Repairs
In recent years, there has been a growing movement towards sustainable fashion. People are becoming more conscious of the environmental impact of the fashion industry and are seeking ways to reduce it. One of the key principles of sustainable fashion is to prioritize clothing repairs over buying new garments. By embracing this approach, you become an active participant in the sustainable fashion revolution.
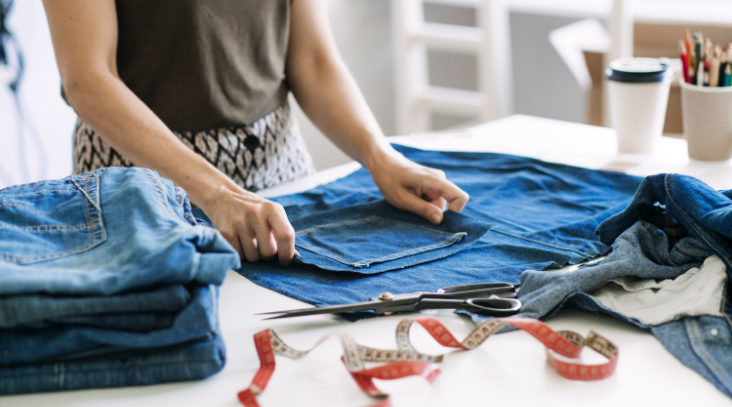
Essential Tools for Clothing Repairs
Before you begin your clothing repair journey, it's essential to gather the necessary tools. Here are some items you should have in your repair kit:
- Sewing machine: A sewing machine can greatly speed up your repair process, especially for larger and more complex repairs.
- Needles and threads: Invest in a variety of needles and threads of different colors and strengths to accommodate different fabrics and repairs.
- Scissors: Sharp scissors are essential for cutting fabric and threads with precision.
- Seam ripper: A seam ripper helps you remove stitches without damaging the fabric.
- Pins and safety pins: Pins are handy for holding fabric in place during repairs, while safety pins can temporarily hold seams together.
- Iron and ironing board: Ironing your garments before and after repairs ensures a neat and professional finish.
Hemming: Shorten or Lengthen Pants, Skirts, and Dresses
Hemming is a fundamental sewing technique that allows you to shorten or lengthen pants, skirts, and dresses. Here's how you can do it:
- Measure: Determine the desired length of the garment and mark it using pins or fabric chalk.
- Cut: Trim the excess fabric, leaving a small allowance for the hem.
- Fold: Fold the fabric twice, hiding the raw edge, and pin it in place.
- Sew: Use a straight stitch on your sewing machine or hand sew using a needle and thread. Remove the pins as you go.
- Press: Iron the hem to give it a polished look.
Patching: Repair Holes and Tears
Patching is an effective way to repair small holes and tears in your garments. Follow these steps to patch a damaged area:
- Prepare the patch: Cut a piece of fabric slightly larger than the damaged area. It can be from an old garment or a fabric scrap that matches the color and texture of the original fabric.
- Secure the patch: Place the patch on the wrong side of the garment, aligning it with the hole or tear. Pin it in place.
- Stitch the patch: Sew around the edges of the patch using a sewing machine or needle and thread, ensuring it is securely attached to the garment.
- Trim and finish: Trim any excess fabric and press the patched area with an iron.
Button Replacement: Fix Missing Buttons
Losing a button doesn't have to render a garment unwearable. Follow these steps to replace a missing button:
- Select a matching button: Choose a button that closely matches the remaining buttons on the garment in terms of size and color.
- Attach the button: Thread a needle and knot the end. Insert the needle from the wrong side of the fabric, coming out at the position where the button will be placed.
- Secure the button: Pass the needle through one hole of the button and then through the opposite hole. Repeat several times to ensure the button is securely attached.
- Knot and secure: Once the button is securely attached, knot the thread on the wrong side of the fabric and trim any excess.
Conclusion
Clothing repairs made easy are an invaluable skill that can help you extend the lifespan of your wardrobe while contributing to a more sustainable future. By following simple sewing techniques and investing in the necessary tools, you can mend holes, replace buttons, and hem garments with ease. Remember to take care of your clothes, prevent common issues like color fading, and address repairs promptly. By adopting these practices, you'll not only save money but also reduce your environmental impact. So, why not unleash your creativity and transform your damaged clothes into unique fashion statements through the power of repairs?